

Checking the browsing history using the Asus routers can help supervise how other users interact with the network. You can monitor what your children are watching and help them safely use the internet. But several users don’t know how to check their browsing history on the Asus router. If you’re one of them, welcome to this guide. This article will teach us the step-by-step process of viewing browsing history on your router, including the websites visited and the devices used to access the internet. Let’s read!
Does your ASUS router support Web History?

Before diving deep into the actual method, it’s essential to check whether your Asus router has the option for checking browsing history. The steps to check these options are as follows:
- Step 1: Visit Asus’s official website by clicking on the following link: [https://www.asus.com/].
- Step 2: Click the Search button from the top-right section, enter your router’s model, and press Enter from the keyboard.
- Step 3: Find your router and click on it to reveal its specifications.
- Step 4: Go to the router’s Tech Specs > Traffic Control and look for the Website history here.
- Step 5: If there is “Yes” for the Website history, your router has the history monitoring feature.
Note: You should move to the next section only if the Website History feature is available on your monitor. If not, you can’t monitor the browsing history since the monitor lacks this feature.
How to check the browsing history on the Asus router?
Suppose your Asus router has the options for the Website History. In such a case, we’ll tell you the step-by-step process to monitor the browsing history on the router. The steps are included as follows:
Step: Set up your computer and router.
- First, you need to connect your computer to the router.
- You can connect wirelessly by turning on the router and connecting to the router’s default Network name.
- For a wired connection, simply turn on the monitor and use the wired connection to connect your computer to the router.
Step 2: Log in to the Web GUI.
- Click on the following link [https://router.asus.com/] to open a web browser and access the Web GUI.
- Enter your login credential, e.g., Username and Password.
- Click on the Sign In button.
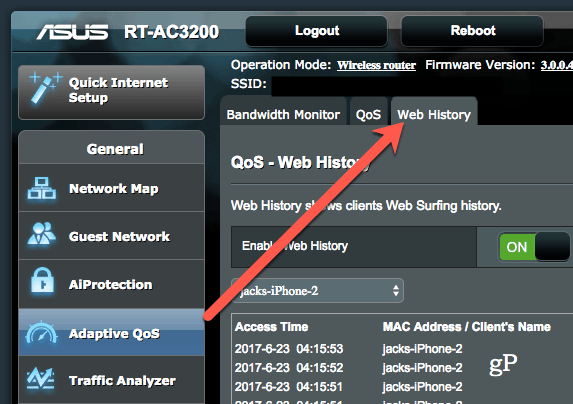
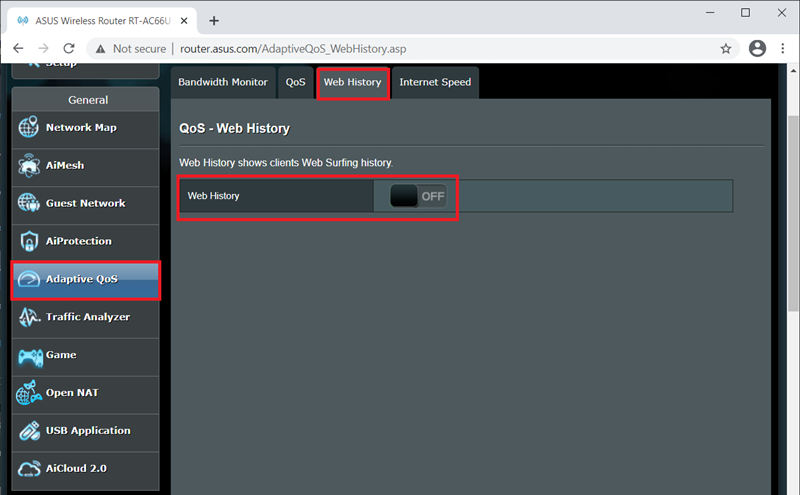
Step 3: Access Web History.
- Once logged in, go to General > Adaptive QoS > Web History.
- Turn on the Web History by clicking on the consecutive button. [This feature is off with the default setting.
Step 4: Check the browsing history
- When the Web History is activated, you’ll see the surf history of all the users connected to the network.
- Use the drop-down menu, All clients, select any client and check their history.
- Use Next to view the records.
- Use the Clear button to clear all the history if you want to. Remember, you can’t recover the browsing history once it’s cleared.
Check the history on a router that lacks history monitoring
If your router lacks a built-in browsing history monitoring feature, you can use a few alternatives to track your network’s browsing activity.
- Use a third-party router firmware: Some open-source firmware, such as DD-WRT and Tomato, offer advanced features such as browsing history monitoring. This firmware can be installed on compatible routers, providing the feature.
- Use network monitoring software: Various software applications available for Windows and Mac computers can monitor network activity and provide information on which websites have been accessed.
- Use a VPN service: Some VPN services offer network monitoring and tracking features that can show you which websites are being accessed on your network.
- Use a Smart plug/switch: A smart plug or switch can monitor the activity on a device level. This will allow you to monitor the activity of specific devices, and you can use it to monitor the activity of a device used for browsing.
Note: It’s important to note that some of these alternatives may require technical knowledge to set up and use and may provide a different level of detail than a built-in browsing history monitoring feature.
Why check the web history on routers?
There are a few reasons why someone might want to check their web history on a router:
- Parental Control: By checking the browsing history on a router, parents can monitor their children’s internet activity and ensure they are not accessing inappropriate content.
- Network Security: Checking the browsing history on a router can help identify any suspicious activity on a network, such as attempts to access malicious websites or potential hacking attempts.
- Troubleshooting: If a device on the network is experiencing connectivity issues, checking the browsing history on the router can help identify the cause of the problem.
- Monitoring: Checking the browsing history on a router can give an idea of the usage of the internet and help in managing the internet usage of the house.
- Auditing: It can be helpful for businesses and organizations to keep track of the websites their employees are accessing on their network for security and compliance purposes.
Conclusion
Checking your browsing history on an ASUS router is a simple process. All you have to do is to access the router’s web interface through a web browser, navigate to the General > Adaptive QoS > Web History, and turn on the Web History if it’s turned off by default. You can view a list of all the websites accessed through your network in this section. It is important to note that this feature may not be available on all ASUS router models and that some models may have slightly different steps for accessing the browsing history.