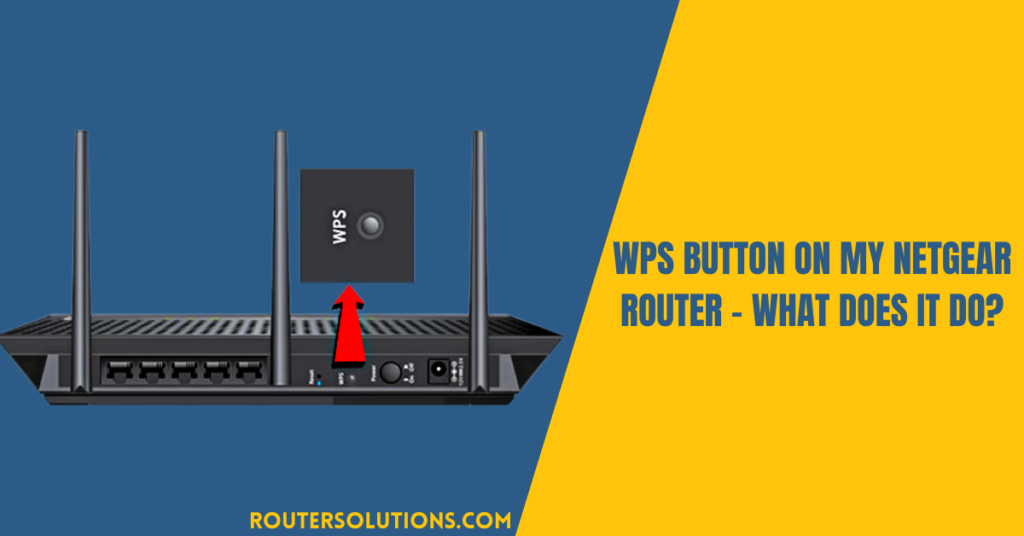
Locating the WPS button on a Netgear router is a task for those who have never used a router in their lives and struggle to find it. Locating this button is quite necessary because it helps you in different situations whenever you need to configure or set up your router. So, if you are wondering where the WPS button on your Netgear router is, then you have landed at the right place.
What is the WPS button on router?
The WPS button or the Wi-Fi Protected Setup push-button is now available on all modern routers that let a user establish a connection between his device and the router. This button reduces the hassle of the wireless connection between the router and the wireless device. However, locating it is not a complex process if you follow the instructions given in this article carefully.
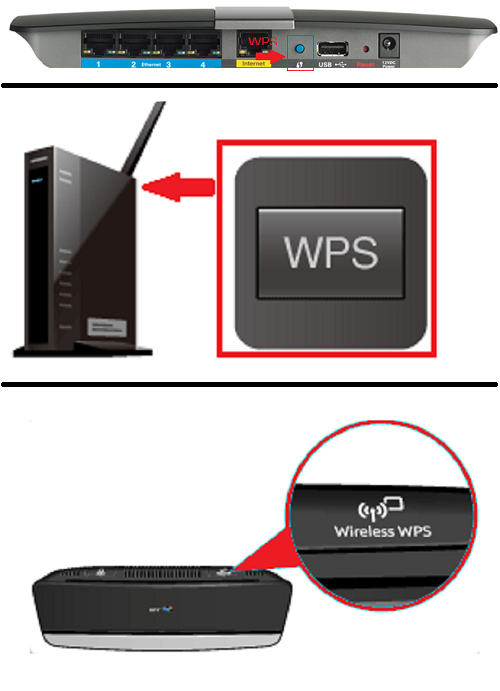
Where is the WPS button located on my Netgear router?
This button can be either located on the front of the router or in some routers it can be found at the back as well. And then there are some routers such as Wireless-G routers on which the WPS button is not available. If you are looking for a WPS button on Xfinity, Netgear, Dlink, TP-link, and Spectrum router, then you may easily locate it either on the back or front of the router.
Connect a wireless device using a Wi-Fi Protected Setup button
- Go to the ‘Settings’ menu of your Netgear router.
- Then, select ‘Network’.
- Next up, select ‘Network Set up/Setup Network Connections’.
- Now, choose one of the options; Wireless, Wireless LAN, or Wi-Fi.
- On the next screen, select ‘WPS (Push Button)’ and select ‘Start’.
- When your device starts searching for a network, press the WPS button.
- Then, heave a breath of sigh and select your router’s name.
- Enter the passkey, if prompted, and then select ‘OK’.
Fix WPS button on router not working
- Insert a pin in the reset hole on the back of the Netgear router.
- Wait for the router to reboot.
- Press the WPS button for 5-6 seconds.
- The router WPS light would start flashing by now.
- If it doesn’t help, complete the Netgear router login process.
- And, enable the manual wireless setup on your Netgear router.
Frequently Asked Questions
What is the WPS push button?
The WI-Fi Protected setup or WPS push button allows a user to establish a stable and uninterrupted connection between his wireless router and the PC. This reduces the hassle of manually connecting your router, specifically a Netgear router and PC. You can easily find this push button on the back or front of the device.
How to Connect Your Android Device to a WPS Router?
- Go to the ‘Wi-Fi’ section from the ‘Settings’ menu.
- Find and press the WPS button on the router.
- Then, click on ‘Wi-Fi Preferences’ or ‘Advanced’.
- Select ‘WPS Pin entry’.
- Wait for a few moments and let the connection establish between your Netgear router and PC.
What does the WPS button on a router do?
The WPS button on a router, being specific about Netgear router, allows the user to quickly connect his wireless devices to it. Nowadays, most of the routers as well as the printers come equipped with the WPS button making it easier for the users to establish a network connection.
What happens when I press the WPS button on my router?
When you press the WPS button on any router including a Netgear router, the nearby devices which are in its range get to identify your router and it appears in their ‘Available networks’ list. However, only those will be able to connect to it who have the security key for it.
Where is the WPS button on my router?
Be it any router or a Netgear router, there is a WPS button on it that enables the user to connect to the network. However, many users find it difficult to locate the button. The WPS push button or Wi-Fi Protected Setup button is present on the back or front of the router, in most cases.
Does WPS button reset router?
In case there arises a need to reset the Netgear router and you are not aware of the method to do it, then there is a method that lets you reset your router. You can simply use the WPS button to reset your router including a Netgear router. All you need to do is press the WPS button for about 10 seconds until the LED shines, release it and then wait for the reset to complete.
What if my router doesn’t have a WPS button?
In case there is no WPS on your router, then there is no need to worry as you can always use the web-based interface to set up your router or establish a connection between your Netgear router and the wireless device. You just need to keep the network SSID and password handy for the setup.
Why is my wifi extender not connecting?
There are several possibilities that might be resulting in this problem. Sometimes, the Wi-Fi extender is not within the range of the Wi-Fi network causing connection issues. Apart from this, if the firmware of the extender is not updated, then also you will face this problem.
How long do I press the WPS button on my Netgear router?
In case you just need to press the power button for the purpose of connecting it, do not press it for more than 5 seconds. However, if you need to reset your Netgear router through the power button, then a user needs to press it for about 10 seconds and wait for the process to end.
Should WPS be on or off?
Most experts suggest that one should keep the WPS disabled as it is insecure making it a more vulnerable attack. One should only make use of the Wi-Fi Protected setup if he is unable to connect to his wi-fi through the web-based portal.
What is the difference between WPS and WPA?
The WPS or Wi-Fi Protected Setup is a modern-day technology that has been created to facilitate the primary setup in the process to establish a wireless connection. On the other hand, WPA or Wi-Fi Protected Access is a security protocol that allows the connection only after the completion of the decryption process.
How to disable WPS in main access point of a Netgear router?
- In the search bar of a web browser, type 192.168. 1.1.
- After this, type the admin username and password.
- Go to the ‘Advanced’ Settings and select ‘Wireless’.
- Now, select ‘WPS’ from the tab.
- And, move the toggle from ‘enable’ to the ‘disable’ position.