
Netgear Routers are one among the most popular networking devices that are popularly known for their top-notch routing capabilities and their cost-effectiveness. You can easily configure Netgear Router by using both the wired as well as wireless methods. You can use a Netgear router with devices like computers, mobile phones, tablets, iPads, etc.
But there are some situations when you face problems while configuring a Netgear Router to your device. There are some more issues with Netgear router settings that you may encounter with your router where you need to block the IP address on router Netgear. You should carefully follow the recommended guidelines to troubleshoot any error by blocking. Read this article to know in detail how to block services from the Internet on the NETGEAR router using the router web interface.
How do I Block IP Addresses on Router Netgear?
You can follow the steps given below to block services from your NETGEAR router using the router web interface:
- Launch an internet browser and visit www.routerlogin.net from a device connected to the network.
- Enter a username and password as admin and password for router login, respectively. Make sure that both details are case-sensitive.
- If you are unable to login by using default credentials, then you might have changed the admin password. In such a case, you should perform a factory reset to restore the router to its factory default settings.
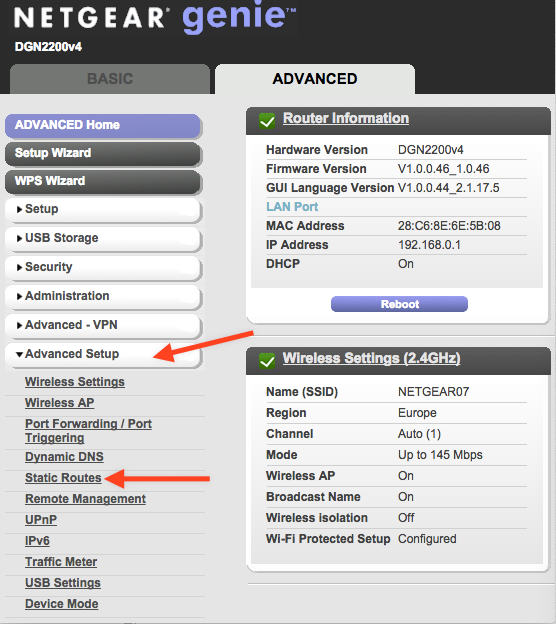
- Go through ADVANCED > Security > Block Services.
- Select one out of the following Services Blocking options:
- Per Schedule. This option basically turns on service blocking as per the Schedule settings.
- It is used to turn on services blocking all the time (independent of the Schedule).
- Then, click Add option under Service Table. This will display the Block Services Setup window on your screen.
- Select the Service Type (FTP, HTTP, etc.) that you want to block. In case, if the option is not listed in the drop-down list, you need to choose User Defined.
- If you have chosen User Defined option, specify the TCP/UDP protocol and the port numbers(s) that you want to block.
- By default, all users don’t have access to use the blocked protocol. If you want some users to be blocked from your account, specify the IP addresses of their system in the Filter Services For section.
- At last, click Add button. After which the settings are automatically saved to the Service Table.
Hope, the above methods might have helped you to block an IP address from an individual computer by configuring the computer’s Hosts file. Unfortunately, there are no standard rules or specific instructions that you can follow to configure the firewall settings. But this article will definitely help you to achieve what you want.